Friday, December 30, 2011

BBQ Tofu Sliders with Baked Sweet Potato Fries

This recipe takes like 3 minutes to prepare and works as an excellent appetizer for veg and non-veg friendly crowds.  The trick is using delicious BBQ sauce and using a ton of it.  I got my slider buns at Trader Joes for like two dollars and they are awesome.  Obviously, if you don't have slider buns you can make regular sized burgers but tiny little burgers are so much more fun to eat.  I make this recipe when I am feeling really lazy so I usually just add pickles but you can top them with whatever you want, I have topped them with vegan coleslaw and onion and that is just killer!  I have also baked the bbq tofu in bite size pieces and served them as appetizers, you can do a lot with the bbq tofu.

BBQ Tofu Sliders

1 16 oz block of super firm tofu sliced 1/4 inch thick
BBQ sauce (I like Red Tail bbq sauce and it has no high fructose corn syrup)
Slider Buns
optional: pickles, coleslaw, onions, lettuce, tomato, grilled onions or whatever you like

1. Pre-heat oven to 400 degrees.  Place tofu on a baking sheet sprayed with non-stick spray and cover each piece of tofu with a generous amount of bbq sauce.  Put in the oven for 12-15 minutes until the bbq sauce begins to caramelize but not burn.  Turn over and cover the bottom of the tofu with a generous amount of bbq sauce and cook for another 12 minutes or so until the bbq sauce begins to get crispy.  If needed cut your baked bbq tofu so they fit nicely in the slider bun and top with toppings of your choice.  Serve with sweet potato fries, salad, coleslaw or whatever you wish.

Sweet Potato Fries

1 pound of sweet potatoes cut into french fry shapes
olive oil
salt and pepper to taste

1.  Pre-heat oven to 400 degrees.  Place sweet potatoes on a baking sheet and drizzle olive oil over the top until the potatoes are lightly coated and add salt and pepper to your taste.  Cook for 15 minutes and then take out of the oven and turn over to try to get both sides crispy, put back in the over to cook for another 10 minutes.  Be careful sweet potatoes are very easy to burn do to there sugar content.

Note: You can cook the tofu and the fries in the oven at the same time and have a nice dinner done in less than 30 minutes.

Tuesday, December 27, 2011

Raw Carrot Cupcakes with Cashew Cream Frosting

In spite of the normal disgraceful holiday binging I have been participating in I am still trying to gear up for my New Years raw food cleanse and juice fast which is why I came up with these delicious little suckers.  They are hella easy to make and hella easy to eat like ten of them so watch out.  I am slowly becoming obsessed with raw desserts which is awesome because they are healthy and uber easy, the only thing that sucks is I have like the tiniest food processor (if you gots a food processor laying around collecting dust holla).  Keep yourself posted because I will be pouring my heart out to the world throughout my cleanse and the remainder of my weight loss journey via vlog which should be interesting.

Raw Carrot Cupcakes

1 1/2 cups carrots finely shredded
2 cups raw walnuts
3/4 cups raisins (I used golden)
1/2 cup raw shredded coconut
1/4 cup agave
1 tablespoon melted coconut oil (coconut oil can be melted by putting the jar in a bowl of hot water)
1/2 teaspoon salt

1.  Blend walnuts in the food processor until a powder consistency forms then add raisins, coconut and salt and to food processor and mix until the raisins are blended in smoothly with all other ingredients.  Place the walnut mixture into a bowl and add carrots and agave and mix with your hands.  The cake can be formed into pretty much any shape.  I used an espresso cup lined with saran wrap to make mini-cupcake looking things.  Top with Cashew Cream Frosting...


Cashew Cream Frosting

1 cup raw cashews
1/4 cup agave
water
pinch of salt

1.  Place the cashews agave and salt in a blender and add water just until the cashews are covered and blend.  If mixture is too thick add water 1 tablespoon at a time until it easily blends.  Add to dessert of your choice.

Monday, December 26, 2011

Veggies and Biscuit Pot Pie

I saw a recipe on the internet for chickens and biscuits that looked scrumptious so I decided I would veganize it with my own twist and bring it to my family christmas dinner.  This is the kind of dish that you could throw pretty much anything into so be creative with this one.  I like my pot pies real classic as you can see in this recipe but I have been thinking about making a mushroom and leek pot pie... yummmmm.  I cooked my pot pie in the most excellent gift I have ever received, a beautiful yellow cast iron dutch oven from my bff Sally, that girl is the bomb diggety!

This is a great recipe to bring to a potluck or anything where you need to feed a large group.  I told a lot of my family it was vegan but I don't think most of them even noticed and they ate the shit out of it and loved it.  Glad I brought a veggie dish because the menu was... well lets just say very carniverous.  You can pretty much use any recipe for the biscuits or you can top with a pie crust or fillo dough.  I will post the recipe I used for biscuits from vegweb because it was pretty much a perfect biscuit.

Veggie and Biscuit Pot Pie

1 large onion diced
3-4 cloves garlic minced
3 tablespoons earth balance (or any other vegan butter)
3 tablespoons flour
1 1/2 cups vegetable stock
1/2 cup unsweetened milk alternative (soy, almond, rice etc...)
6 red potatoes chopped in 1/2 inch pieces
5 medium sized carrots sliced in thin circles
1 head of broccoli cut into 1/2 inch peices
1 cup of mushrooms sliced
salt and pepeper to taste
1 recipe for biscuits see below

Pre-heat oven to 375 degrees

1.  Saute onion and garlic on medium heat in an oven proof pan for 3-4 minutes until onions begin to soften.  Add the butter and flour and cook stirring constantly for a couple of minutes just until it begins to brown.  Then add the rest of the ingredients and bring to a boil and reduce to a simmer.  While the vegetables are beginning to cook and the gravy is beginning to thicken make the biscuits.

2.  It should take about 10-15 minutes to make the biscuits so once your done top the veggie and gravy mixture with the biscuits and place in the oven for 20-30 minutes until the biscuits are a golden brown on the top.  If you do not have an oven safe dish you can cook the veggies in any large pan and then place in the baking dish of your choice.

Note:  If the gravy seems a little to thick add more vegetable stock and if it seems to thin add some cornstarch.


Savory Biscuits

Ingredients (use vegan versions):

    2 tablespoons raw apple cider vinegar
    1 cup nondairy milk
    1-2/3 cups unbleached white flour
    1/3 cup nutritional yeast flakes
    5 teaspoons baking powder
    1 teaspoon dried herbs
    1 teaspoon salt
    5 tablespoons margarine

Directions:

1. Preheat oven to 450 degrees Fahrenheit.

2. Buttermilk: To a measuring cup, add apple cider vinegar. Add nondairy milk to fill the measuring cup to the 1 cup measurement line. Stir gently and let sit for a minute to curdle.

3. In a bowl, combine the flour, nutritional yeast flakes, baking powder, herbs, and salt. Cut the margarine into the flour mixture until mixture is crumbly. Add the “buttermilk” to the flour mixture and stir into a ball of dough.

4. On a lightly floured surface, roll the dough out to about 1 inch thick. Cut biscuits with a sharp cutter and place on lightly oiled cookie sheet.


Recipe courtesy of vegwebber Lezly, you can find the recipe here: http://vegweb.com/index.php?topic=16632.0

ENJOY!!!

Wednesday, December 21, 2011

Sweet Potato and Black Bean Chili with Jalapeno Cornbread

I grew up on Denison's Chili Beans in a flour tortilla with cottage cheese... yup yup and I loved every last bit of it.  Cottage cheese?! you ask, well yes but I can't explain why and I will to this day defend it as nastolgic delicious food that I will never eat again along with fried bologna sandwiches.  We all know that canned chili just does not stand up to the real thing, even if it is covered in cottage cheese.

I am always trying to think of ways to add extra nutrients and whole foods to my recipes so I decided to add sweet potatoes and zuchinni to this version of chili.  I was a little nervous about the sweet potatoes but I really enjoyed the sweetness they added, my lover was not a fan but what does he know about food he is one of those freaks that just forgets to eat... who the fuck does that!?  For the cornbread I used a packaged mix and instead of the honey I used agave and instead of the eggs I used flaxseed (1 tablespoon of flax meal with 3 tablespoons of water heated until an eggy consistency forms).  For jalapeno cornbread just add a couple of chopped jalapenos to the the batter and leave in some of the seeds if you like it on the spicier side.  I liked the jalapenos but I have found better more vegan friendly recipes for cornbread on vegweb.

Sweet Potato and Black Bean Chili


1 tablespoon oil
1 large onion chopped
1 green bell pepper chopped
4 cloves garlic minced
2 jalapenos chopped
2 zuchini's chopped
1 Giant sweet potatoe or 2 regular sized sweet potatoes peeled and cut into 1/2 inch peices
1 12 oz can of chopped tomatoes
2 12 oz can of black beans (I only had one can of black so I had to use a second can of pinto)
1 teaspoon chili powder or more if you like it spicy
3 teaspoons cumin
salt and pepper to taste
optional toppings: avocado, green onions, cilantro, cashew cheese, vegan cheese, tortilla chips

1.  Heat oil on medium in a large pot and add onion and bell pepper, cook 3-5 minutes until tender.  Then add the garlic and jalapenos and continue to cook for 1-2 minutes until the garlic becomes very fragrant.  Add the rest of the ingredients, bring to a boil then lower to a simmer. Cook for  45 minutes to 2 hours, the longer you simmer the better it will taste.  Salt and pepper to taste and add any toppings of your choice and it's ready to go.  If it seems too dry just add a little water or vegetable stock.

Mine is topped with avocado, cilantro and leftover cashew cheese from my eggplant parmesan as you can see...


And once you are finished consuming this delicious recipe you can sing "Beans Beans the magical fruit the more you eat the more you... " Yes I just went there, I just can't help it. I will never grow out of my obsession with fart and poop jokes, just typing the word poop makes me smile:) Happy eating!


Tuesday, December 20, 2011

Cookie Party!

So EVERY single year my sister and I get together and invite friends over for cookie decorating and it is a blast.  I will leave the recipe I used for the cut-out sugar cookies at the bottom, it worked well but I think I will still be on the hunt for a recipe that has a little more of that flakey vegan buttery goodness.  Though there were some RIDICULOUSLY AMAZING cookies the winner of this years most awesome cookie goes to my favorite sister in the world, check it out!
MEATWAD!  I know this is a vegan blog but Meatwad is fricken hilarious and it is cookie art at it's best, good job sis!  Here are some more pics of our fun day:
A group shot of Wendy's back, Laura, my big sis and my lover, yeah he's sexy and he's vegan and he decorates cookies and he's mine bitches!  Anyways, enough of me being a psycho jealous gf and back to the cookies. As you can see in this pic my sister has the most redick collection of cookie sprinkles known to man and as you can see in the next picture she also has a great cookie cutter collection.
Here are a couple of close ups so you can better see the awesomness:
Here is Laura's plate of cookies which this picture totally does not do justice to but you can see this beezie has gots skills...
And watch out for Kenny's sequin shirt and glitter pants wearin lover boy of a gingerbread man
I made vegan cut-out cookies and vegan icing for me but other people that came over brought non-vegan cookies and a few non-vegan decorations.  Here are the recipes I used for the cookies and icing:

Vegan Cut-Out Sugar Cookies

Directions:


  1. 1
    In a medium sized bowl mix together flour, sugar, baking powder, and cinnamon set aside.
  2. 2
    In another bowl, mix together wet ingredients.
  3. 3
    Add the wet ingredients to the dry ingredients.
  4. 4
    Start preheating oven to 350 Fahrenheit.
  5. 5
    Roll dough out and cut out shapes with cookie cutters.
  6. 6
    Bake in oven on a lightly oiled cookie sheet for about 10-12 minutes.
Recipe courtesy of: http://www.food.com/recipe/vegan-cut-out-sugar-cookies-272260#ixzz1h3fEMgpY


Simple Cookie Decorating Icing


1 cups powdered sugar for every color of icing you would like
milk alternative
food coloring


1. Place powder sugar in small bowl or cup and add milk alternative one tablespoon at a time until desired consistency.  If it is too thick add more "milk" and if it is too watery add more powder sugar.  Then add food coloring of your choice to sugar and mix and you are ready to go.  


Note:  This shit is not as easy as it looks, like I said we have been doing this EVERY year since as far back as I can remember so were pretty much professionals.  When you venture off into cookie decorating heaven just remember to relax and think outside of the cookie cutter and you will be fine.  

Monday, December 19, 2011

I Won a Vegan Giveaway! Whoopee!

Just got an email confirmation that I won a Vegansauraus giveaway from Alison's Gourmet!  And this is how happy I am...

The contest went like this, just dream up a confection you have been dying to sink your teeth in and the best idea wins... and I won!  Hiphiphooray!  My idea was a giant homemade marshmallow dipped in caramel then in chocolate and rolled in almonds and coconut.  You can check it out here: http://vegansaurus.com/post/13980504857#disqus_thread. I better get on my extravagant winnings of a $20 gift card pronto so I can stuff my face with junk food before January 1st which is my official start date for giving up sugar :(  Sad I know, but I will NOT be giving up desserts there are plenty of things you can do with dates and stevia.

Keep yourself posted for some cookie party fun and vegan sweet potato and black bean chili with jalapeno cornbread!!!

Friday, December 16, 2011

Eggplant Parm with Cashew Cheese over Pesto Spaghetti Squash


I know what you are thinking, where the eff did this crispy picture come from?!  Well, I gots myself a real camera, no more crappy crackberry pics for me! :)  This is a true Vegan Beezie original I came up with today.  It is a mix between a couple of dishes I have whipped up in the past.  The idea for this dish came to me as I was riding home from the YMCA with a backpack full of donated food I stole (with permission) which included basil, slider buns, and pizza dough (slider and pizza recipes soon to come).  I decided to make a dish out of the basil since the other two items freeze well and since I'm trying to kick-up my whole foods intake this recipe seemed like a good way to do it.  It seems like a lot of work if your a lazy ass like me but if your funemployed like me you can still be a lazy ass and make awesome dishes like this.  All joking aside this recipe is totally awesome and I totally suggest you give it a try.  I will leave some possible shortcuts at the end for those of you with lives.

The Squash

1 large spaghetti squash split in half and innards removed
olive oil
salt

1.  Pre-heat oven to 375 degrees.  Rub olive oil on the cut side of the squash and sprinkle with a generous amount of salt.  Place squash on a baking sheet cut side down and bake for 30-40 minutes until you can easily stick a fork in it.

2.  Once squash is complete scrape the "meat" out with a fork as to create a spaghetti pasta like consistency. See picture below...


While the squash is baking you can prepare the rest of the recipe...

Eggplant Parm

1 large eggplant sliced into 1/4 inch circles
salt
1/2 cup unsweetened soy milk
1 cup flour
1 1/2 cups bread crumbs
1/4 cup nutritional yeast
1 teaspoon garlic powder
1 tablespoon Italian seasonings
salt and pepper
olive oil

1.  Begin by covering the eggplant with a generous amount of salt and let stand for 30 minutes for the water to begin to be pulled from the eggplant.  This is a very important step when making any kind of eggplant.  If your eggplant usually sucks it is probably because you are skipping this step, don't skip it!!! (while eggplant is standing make your cashew cheese and pesto)

2.  Once 30 minutes is up thoroughly rinse salt from the eggplant and prepare yourself for some serious assembly line dipping.  Place soy milk, flour and bread crumbs in shallow bowls or plates or anything that you can easily dip the eggplant into to.  Mix the garlic powder, Italian seasonings, salt and pepper into the bread crumbs and your ready to begin dipping.  First dip eggplant into the flour till it is evenly coated, then the soy milk, then the bread crumb mixture.

3.  Once eggplant is covered in the bread crumbs place on a baking sheet that has a generous layer of olive oil and repeat the dipping until all eggplant has been covered.  Once the spaghetti squash is done bring the oven up to 425 degrees and throw the eggplant in for about 12-15 minutes or until lightly browned on both sides.

Pesto

2 cups loosely packed basil
1/2 cup of walnut halves
2 garlic cloves
1/4 cup nutritional yeast
1/3 cup olive oil
salt and pepper

1.  Place all ingredients in your blender or food processor and blend until a nice sauce forms.

Cashew Cheese

1 cup raw cashews
3/4 cup water
3 tablespoons nutritional yeast
1 teaspoon lemon juice or vinegar
salt and pepper to taste

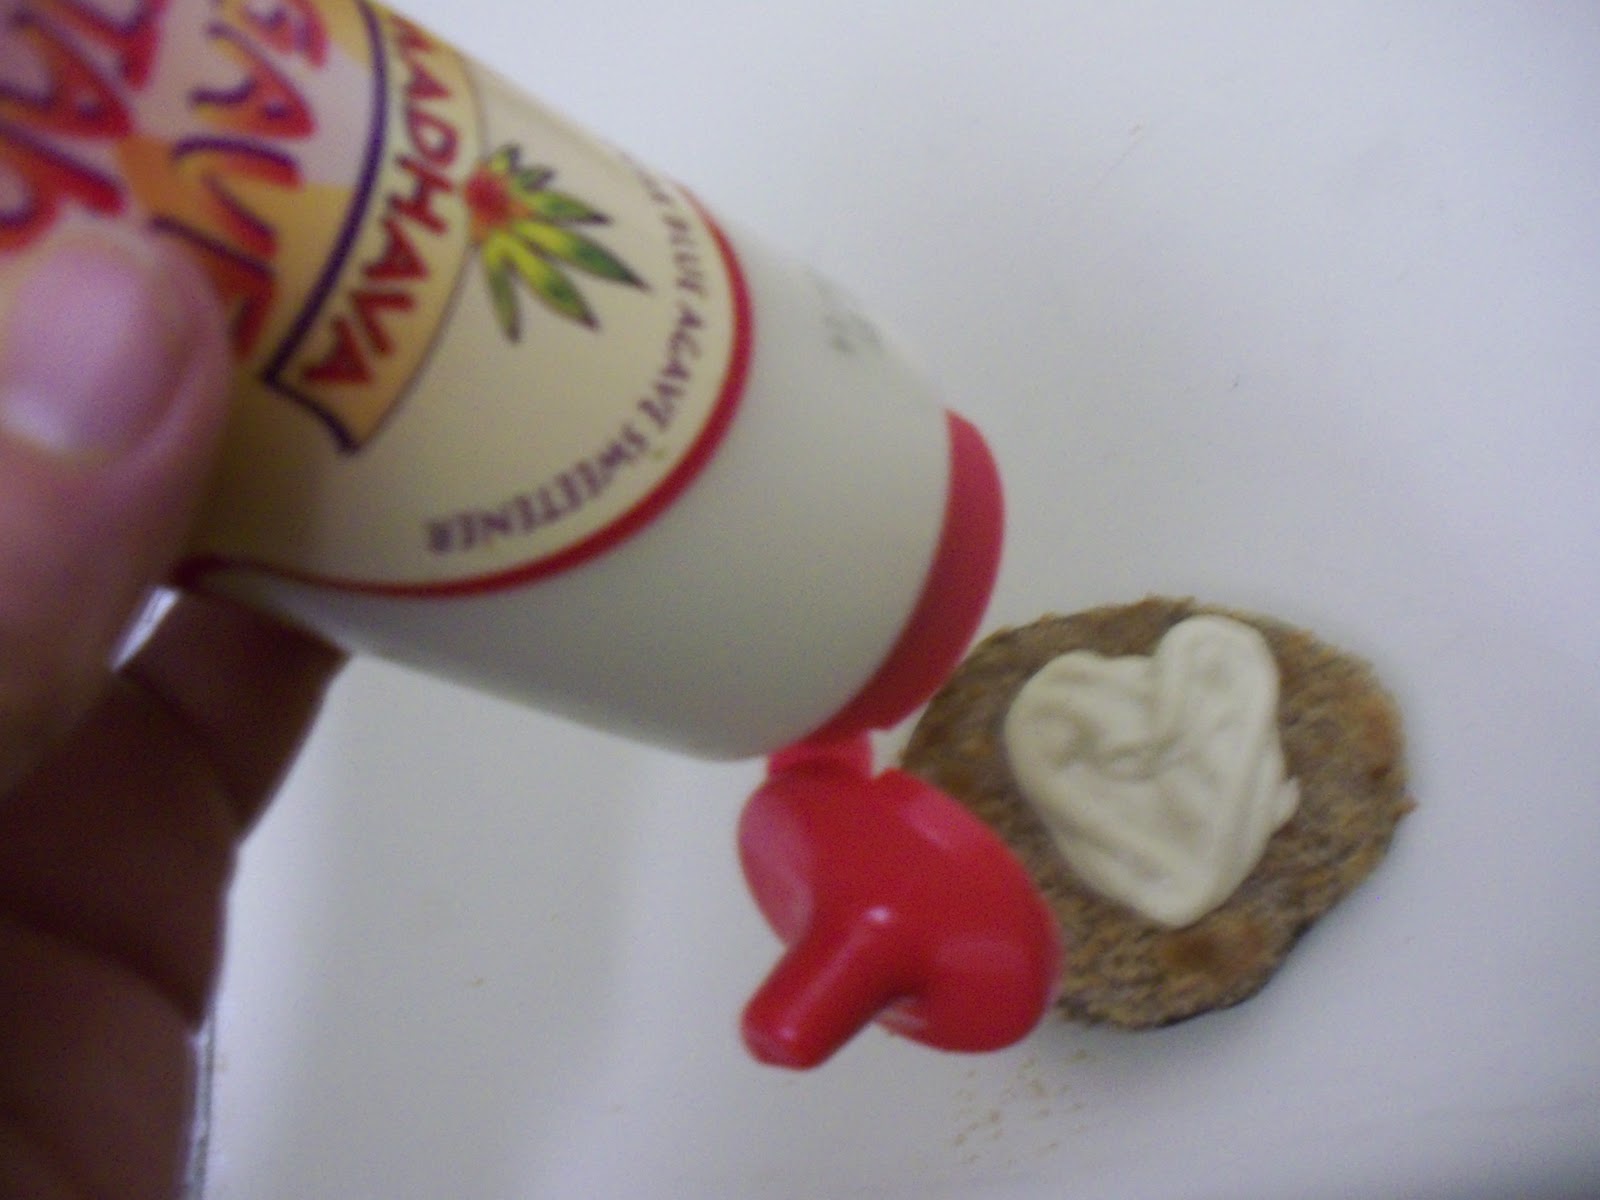
1.  Place all ingredients into a blender and blend until a smooth cream is formed.  I put my finished cashew cheese in a cleaned out agave container for easy presentation and storage.  See picture below.


Finishing off the dish

Mix the pesto in with the spaghetti squash, you can add some veggies to the spaghetti squash at this time if you wish, I added tomato and spinach to mine but you can add anything or nothing.  Other ideas for veggies that would work are mushrooms, bell pepper, onion or asparagus (cooked or raw).  Place a big plop of the pesto squash on a plate, lean 3-4 eggplant slices on the squash and finish with cashew cheese.

Some possible shortcuts you could do would be to use store bought vegan pesto instead of homemade or vegan cheese that you melt onto the eggplant instead of cashew cheese.

Note: All recipes in this post are very versatile and can easily be adapted to other recipes.  I put the cashew cheese on like everything these days, pizza, tacos, pasta, crackers... the possibilities are endless. Obviously the pesto can go on a ton of things, the spaghetti squash can be used in place of pasta in any dish and the eggplant can go on sandwiches, pizza or anything you can think of.  Be creative and have fun!!!!
<3

Wednesday, December 14, 2011

Raw Fudge Brownie Treats

Ever since Thanksgiving I have been on a serious sugar binge which is just so eww, so instead of making a banana cream pie (sounds so effin good right now) for my neighborhood holiday potluck I decided to try this schnazzy recipe I came up with.  And oh my,  these healthy little balls of deliciousness are just heavenly.  They taste a little healthy but really pack in a good rich chocolatey punch.  Just an FYI, I will probably be doing more raw food recipes for the next couple weeks to gear up for my raw food/juice fast cleanse I am planning for the beginning of January.  Don't worry though, I am totally not one of those raw foodie freaks who claim that they love the taste of raw kale (eww and double eww!).

Anyways... this recipe is super duper easy and only takes about 10 minutes from start to finish if you skip shaping them into cute little donut hole looking things which I only did for potluck convenience.  These are perfect little treats for those with a sweet tooth who are trying to keep it healthy, so give them a whirl and let me know what you think.

2 cups raw walnuts
12 dates pitted
1/2 cocoa powder
1/2 teaspoon salt
1 teaspoon vanilla
shredded coconut (optional)

1.  Place walnuts in a food processor until a smooth powder forms then add the rest of the ingredients and blend until well mixed.  Press walnut mixture into a small greased pan, 8x8 would probably work or form into donut holes and viola, raw fudge brownie treats.  Store in refrigerator until ready to eat.

Note: You can probably shape these puppies into just about anything, next time I think I will steal one of my sisters mini-cupcake pans (that bitch has like five of them anyways, like who needs that many mini cupcake pans?!), press the walnut mixture into mini-cupcakes and make a frosting out of avocado, cocoa powder and agave to top them off with.

Sunday, December 11, 2011

Pumpkin Waffles


Woke up effin starving and knew my boring smoothie was not going to cut it today so I hopped online and found a recipe for pumpkin waffles from my favorite vegan author Isa Chandra Moskowitz.  I made a couple of minor substitutions, first I used raw sugar instead of brown sugar, two teaspoons of pumpkin pie spice instead of all the other spices and instead of yogurt I added a tablespoon of apple cider vinegar.  They came out good, a tiny bit dense for me but a for sure keeper.  I topped them with some sliced apples, a big blop of earth balance and some maple syrup and yummo.  Note: this recipe makes HELLA waffles which is awesome because you can just throw them in the freezer and pop them in the toaster anytime you are fiending for waffly deliciousness.


2 1/2 cups all purp flour
1/3 cup brown sugar
2 1/2 teaspoons baking powder
1/2 teaspoon baking soda
1/2 teaspoon salt
2 teaspoons cinnamon
1 teaspoon ground ginger
1/2 teaspoon nutmeg
1/4 teaspoon ground cloves
2 Tablespoons soy yogurt
2 cups soymilk
15 oz pureed pumpkin, fresh or canned
1/3 cup oil
2 teaspoons vanilla
Directions
Sift together dry ingredients. In a seperate bowl, vigorously wisk together wet ingredients until well emulsified. Pour wet into dry and combine. Prepare waffles according to manufacturers instructions. I use a normal 4 waffle iron, but I’ve made belgian ones, too.
Recipe obtained from the Post Punk Kitchen.

Beezie Loaf


Beezie Loaf is another long avoided but successful venture of mine.  It began as all other food missions of mine do, 6-8 months of online research of other vegan meatloaf recipes until I just can't live another day without it.  I was even more scared of making "meat" loaf than quiche.  I kept thinking "how the fuck is tofu going to to taste like deliciously baked ground beef covered in catsup and oozing with cow fat?"... and then after months of freaking out about it I gave it a go and guess what?.... pretty effing yummy.  So here is the recipe:

4 tablespoons vegetable oil
1 onion chopped
2 carrots chopped
1 bell pepper chopped 
10 mushrooms chopped 
2 cloves of garlic minced
1 cup walnuts
1 package tempeh
1 package tofu
1 cup bread crumb
1 tablespoon braggs liquid aminos (or salt to taste)
1/2 teaspoon thyme
Ketsup Glaze:
1/2 cup ketsup
3 tablespoons agave 

1.  Pre-heat the oven to 375 degrees.  Saute 2 tablespoons of oil with onion, carrots and bell pepper for 5-10 minutes on medium heat until they begin to soften.  Then add the mushrooms and garlic to the cooking vegetables for 3-4 minutes until mushrooms begin to soften.  The vegetables don't need to be fully cooked because they will finish cooking in the oven.

2.  While the vegetables are sauteing grind the walnuts down to a fine powder in the food processor or blender (I have a vita mix that I use for EVER THING) and place in a large bowl.  Then place the tempeh and tofu in the food processor and mix until smooth then add to walnuts.  

3.  Once the vegetables are done add them to the walnut mixture along with the bread crumbs, Braggs, thyme and last two tablespoons of oil.  Now comes the fun part, mix the rest of ingredients with your hands by grabbing a big handful and letting it gush out the sides and repeating until fully mixed.  

4.  Once the mixture is fully blended place the mixture into a greased loaf pan and press in firmly to form the loaf.  Then turn over on to a baking sheet lined with parchment paper if you have it or liberally greased.  Place in the oven for 50 minutes.  15 minutes before the loaf is done brush or poor the catsup glaze over the top of the loaf.  Enjoy!

Oh wait! This posting is not over!  Check out this extravagant bonus recipe...  Open Faced Beezie Loaf Sandwich and just to let you know the picture does not do the deliciousness of this dish justice.

Here is the recipe:

1 slice of bread, preferably crappy white bread, you know the kind that almost melts in your mouth but any bread will work, I used Alvarado sprouted whole wheat
1 tablespoon veganaise, yes it should be a nasty thick layer of mayo
1 -2 slices of Beezie Loaf depending on how thick you like your "meat"

1. Spread veganaise on bread and top with Beezie Loaf.  

Note:  This sandwich is best consumed under the influence of alcohol.

Thursday, December 8, 2011

Spinach Mushroom Facon Quiche


I finally mustered up enough courage to do it, yes, I really did it, I made a vegan quiche!  I thought about it for an effing eternity but I finally did it and I do NOT regret it.  It was super easy because for Thanksgiving when I made my pecan pie I thought it would be ingenious to just whip together a couple of extra pie crusts... NOT!  Well I did it anyways because once you start something in the kitchen it is hard to turn your back on it especially when you are a cheap ass like me who doesn't like to waste anything.  So I used one of the pie crusts I had tucked away in the freezer, as you can see here:


I will leave the recipe at the bottom but a couple of quick tips on freezing pie crusts before I move on.  Once the pie crust is complete freeze them in the pan first, then remove them from the pan and place in ziplock freezer bag.  According to my research they should last in the freezer anywhere from 3-12 months, I know it's a wide range but this is what the internet told me.  

After doing some more internet research on how to cook a quiche (I do A LOT of internet research) I created what I thought would be the most delicious quiche in the world. 

And there it is, it came out effing rockin!  So Delish!  Here is the recipe, you can use this recipe for a homemade crust or any pre-made crust will also work:

Pie Crust:
1 1/2 cups flour
1/2 cup vegetable shortening
1/2 teaspoon salt
1/2 cup ice water

Filling:
1 small onion chopped
8 mushrooms sliced 
2 cloves minced garlic
1 1/2 cups spinach
6 peices of cooked facon chopped (don't forget to make a couple of extra strips to munch on, them shits are delish)
1 pound firm tofu
1/3 cup unsweetened milk alternative (I used soy)
1/3 cup nutritional yeast
1 tablespoon braggs liquid aminos or salt to taste if you do not have braggs
1/2 teaspoon tumeric for color
pepper to taste

1.  To prepare pie crust bring oven to 375 degrees.  Mix the salt with the flour and then cut the vegetable shortening into the flour mixture.  Once the mixture resembles the consistency of peas you are ready to mix in the ice water.  Mix the water in one tablespoon at a time just until the everything sticks together.  Form the dough into a ball and refrigerate for 30-60 minutes.  Once dough is done refrigerating, roll out to about 1/8 inch thick, place in pie pan and cook for about 12-15 minutes until just barely golden around the edges.

2.  While the crust is baking began to make the filling.  Saute onions on medium heat 4-5 minutes until they begin to become translucent (they don't need to be cooked all the way through since they will continue cooking in the oven) and then add in the mushrooms and garlic and cook until the mushrooms are just slightly browned.  To finish throw in the spinach and Facon and cook just until the spinach is wilted down.

3.  For the "egg" mixture place tofu, milk substitute, nutritional yeast, braggs, tumeric and pepper in a blender or food processor until tofu is a smooth consistency.  If your mixture is to thick to blend together add a little more milk just until it comes together.  Mix the cooked vegetables with the tofu mixture, place in the cooked pie crust and pop in the oven for 35-45 minutes.  Let cool for five minutes before eating.

Makes about 6 healthy sized slices of quiche. 

Note: I could probably eat the whole damn thing but I have a VERY healthy appetite and it's super yummy.